Tools needed:linux system tower panel, environment nginx, mysql, pm2 manager (it comes with nodejs)
1. Create a random directory under the/www/wwwroot folder on the Pagoda Panel, upload the server to the directory, and extract it.
2. The server directory installation relies on the script, pagoda panel ssh terminal, execute cd www/wwwroot/server to this directory, and then execute the command:npm install, waiting for his installation to complete
3. Create a database, select ft8b4 as the database type, import the database help.sql, and after the import is completed, open/pub/config/config.js to modify the database configuration and change it to your own account password.
4. Modifying the configuration of Weixin Mini Programs is also available in/pub/config/config.js
In this file, modify the configuration APP_ID of the Mini programs: "Fill in by yourself",//APPID of the Weixin Mini Programs
APP_SECRET: "Fill in yourself",//APP Key for Weixin Mini Programs
Mch_id: "Fill in yourself",//Merchant number
Mch_key: "Fill in by yourself",//Merchant key (You can not fill in if you don't have a merchant number)
5. Start the project. Open PM2 manager, add a new project, select the path where the project is located, the startup file is bin/www, and the project name can be named at will. Then start the project. The directory where my files are located is here/www/wwwroot/campus service network/server/bin
6. Domain name reverse proxy. Click the Map button in the pm2 manager to map the project to your own domain name (also binding a domain name). The project can then be accessed using the domain name. (If there is no response from clicking on the map, please go to the Pagoda ssh terminal and execute the command/www/wwwroot/campus service network/server/bin, go to this folder and install npm install again. This is just the directory where my files are located, and ultimately it depends on where your directory is located)
7. Access the server project address: http://If your domain name appears extends layout block content h1=title p Welcome to#(title), it means that the server has been deployed successfully
dividing line
--------------
9. Then we start the client deployment tutorial. Create a directory here on the Pagoda Panel/www/wwwroot/, then transfer the client to this directory and decompress it.
10. Pagoda ssh terminal command:cd/www/wwwroot/client directory, then install dependencies, terminal command:npm install, wait for the installation to complete
11. Open the client file src/assets/js/yzy.js
const yzy={
…
NODE_API: "https://api.xxx.com/api/",//change to the domain name address bound to your server
…
}
12. Pack and export the client, command Pagoda Terminal to the client directory:cd/www/wwwroot/client directory, and then run the command:npm run build, wait for the packaging to complete. After the packaging is completed, a dist directory will appear
13. When you enter the dist directory, you will find two files: dist and index.html. Copy and paste these two files into the server/public directory
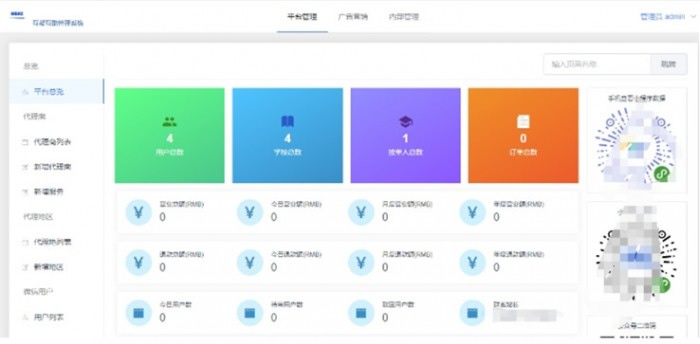
14. Access the domain name bound to the server: http://xxx.xxx.com. The background management login interface appears, with the default account admin password
qwe123123
This is the deployment, followed by the Mini programs. Let's explain it slowly later, it's too much.